 Peter Lord Plaster & Paint, Inc.
 Most of us with an older home have experienced sagging and cracking plaster in our ceilings. While ceilings are affected by all the normal wear and tear that goes on within our houses – structural shifting, leaks and temperature shifts, traffic and vibrations – they have the addition stress of being at the mercy of gravity! Because ceiling surfaces tend to be some of the largest, unsupported surfaces in the house, older plaster systems applied over wooden lath have a limited life span before they begin to break and pull away. The good new is, they can be repaired and saved from further damage.
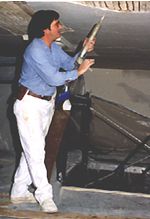
We have successfully reattached many old ceilings and wall areas using a reattachment process which involves injecting glue to create a new bond between the plaster and lath where the keys have been damaged and broken away over time. This technique uses modern adhesive materials that are easy to handle and cause minimal damage to savable plaster, and will restore the old plaster’s integrity for many more years.
After correcting whatever problem made the plaster loose in the first place (leaky roof, structural problems), the first step is to assess how far the ceiling has pulled away from the lath – the extent of the delamination. Gently push on the plaster and judge the amount of play between plaster and lath, and listening for clues to what you will be dealing with. Hopefully, you will feel it going back into place, like a puzzle piece sliding into it’s own unique spot. If there are broken keys or debris in the way, it will resist going back into place, and will feel and sound “crunchy.” Peter refers to this crunchiness as the sound of breaking eggshells or crushing popcorn. Do not force the plaster back into place or more may break, just gently encourage it with the flat of your hand.
If the separation is slight – ¼” to ½”- reattachment success is likely because the plaster will usually push back into place and feel solid and flat against the surface.